It’s motorcycle season! How to get ready for your first ride
Published
1. Rise and shine
Firstly, remove the cover and wipe off the protective film you used to conserve the delicate chrome or other metal surfaces over winter. Use a dry, soft cloth and an all-purpose oil. Your bike will show its appreciation for the extra care with a high-gloss shine.
2. All pumped up
Secondly, check the tyre tread and pressure and, if necessary, inflate or deflate according to the operating manual. If a tyre has already been used for a long period (4–6 years), it’s advisable to change it before the start of the season.
- Expert advice: If you purchased a pre-owned bike or forgot the date of the last change, here’s how to find out about the age of your tyres: take a look at the so-called ‘DOT’ number which consists of letters and numbers on the sides of the tyres; especially at the last four digits. The first two indicate the month and the second two the year of manufacture.
3. Look at the levers
Check all levers, the throttle grip, clutch lever, gear and brake levers. Do they function as they should? Do they work easily? Do they have the necessary play?
4. Get connected
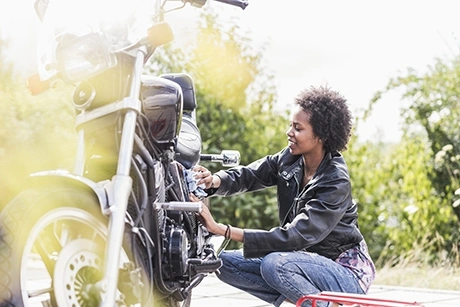
Next, install and connect the charged and tested battery. A fully working battery is key. Make sure yours is analysed with a battery tester and replaced if any charging problems are diagnosed. As long as the battery isn’t yet installed, also check your cable connectors. If they have any corrosion on them, clean it off with a wire brush. This will ensure your battery connects well with your motorcycle’s electrical system. To prevent future corrosion, you can apply special ‘battery clamp grease’. When installing your battery, simply slide it into place and attach the cables to the terminals. Important: Make sure you attach the positive side first and the negative side second. Then put everything in place using the security belt and re- install the motorcycle seat, if it was removed.
5. All switched on?
Test the function of high-beam and dipped headlights, rear light, brake light, indicators and horn. Switch on the ignition only. Check the function of all tell-tale lights, especially for oil pressure and the generator.
6. Start rolling
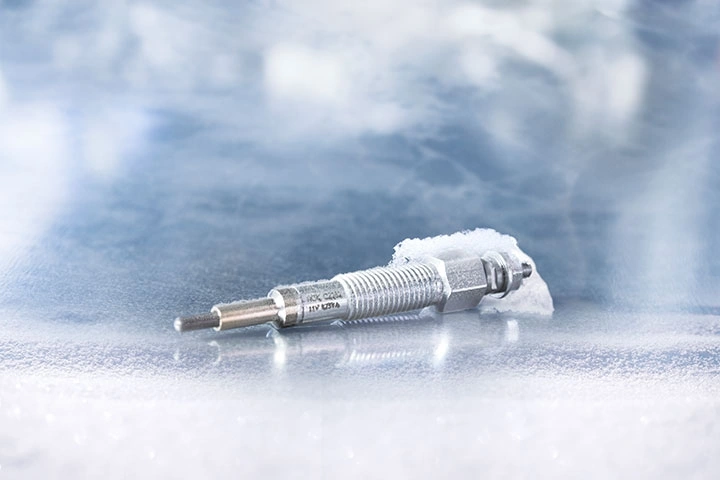
Start the engine, let it run in neutral and wait to check that the oil pressure lamp goes off. If the tank has been filled to the brim with fresh fuel before letting the bike hibernate during the winter months (as it should be), there shouldn’t be a problem with cold starts. Filling the tank completely makes sure there is no remaining empty space inside for the volatile fuel components to evaporate into. But if the tank was only partially filled, the fuel should be replaced. “Residue from old fuel can form an electroconductive layer, which makes the ignition voltage travel along the spark plug’s insulator and housing towards ground. Deposits like this are almost impossible to remove and not always visible to the naked eye. So even if a spark plug looks OK, replacing it might be the only solution if your bike fails to re-start after winter,” explains Kai Wilschrei from Technical Services.
When changing your spark plug, consider an upgrade to Iridium IX spark plugs instead of the normal ‘standard nickel’ type. “NGK Iridium IX high-performance 2-wheel spark plugs were designed specifically for motorcycles. They provide an optimised starting performance with problem-free cold starts, as sooting is no longer an issue,” reveals the expert. “In addition, they can cover at least double the mileage of conventional nickel spark plugs.”
The distinguishing feature of NGK Iridium IX spark plugs is their laser-welded iridium electrode. Iridium is a high-tech metal that provides absolutely outstanding ignition performance – in motorsports as well as in everyday driving. It’s the reason why manufacturers are increasingly fitting iridium spark plugs as standard.
When the engine is running, take a short test run around the block. As you ride, pay attention to the suspension and shock absorption. After driving off on a bike with ABS, the control light on the display should go off immediately after starting. Be careful when using the brakes for the first time. They may react differently to normal, as a thin layer of rust may have covered the discs or drums.
7. Fill up on fluids
Back at home, put the bike back on its main stand and while the engine is still at running temperature, check that the operating fluids have been filled to the correct levels.
The engine oil level should be between the minimum and maximum markings.
The other fluids should also be checked: the transmission oil (if separate from the engine oil), the cooling fluid (with water-cooled engines) and brake fluid. If possible, use a tester to check the water content of the brake fluid. If the water content in the fluid is too high it could boil when the brakes heat up, which may reduce or even cause a complete loss of braking power. It’s strongly advisable to change the brake fluid at least every two years.
Inspecting all the circuits for potential leaks is also recommended (oil drain plug, brake fluid container, radiator, vent screw on the callipers, shaft seals on the fork rods and the rear shock absorbers).
No problems on the horizon? All done? Then enjoy your first ride and stay safe!
 Niterra Blogs

Why Hugo Schwarze hopes for Hypercar glory at the 24 Hours of Le Mans
Read more